Settings
Input customization, button mappings, audio, and controller compatibility.
General
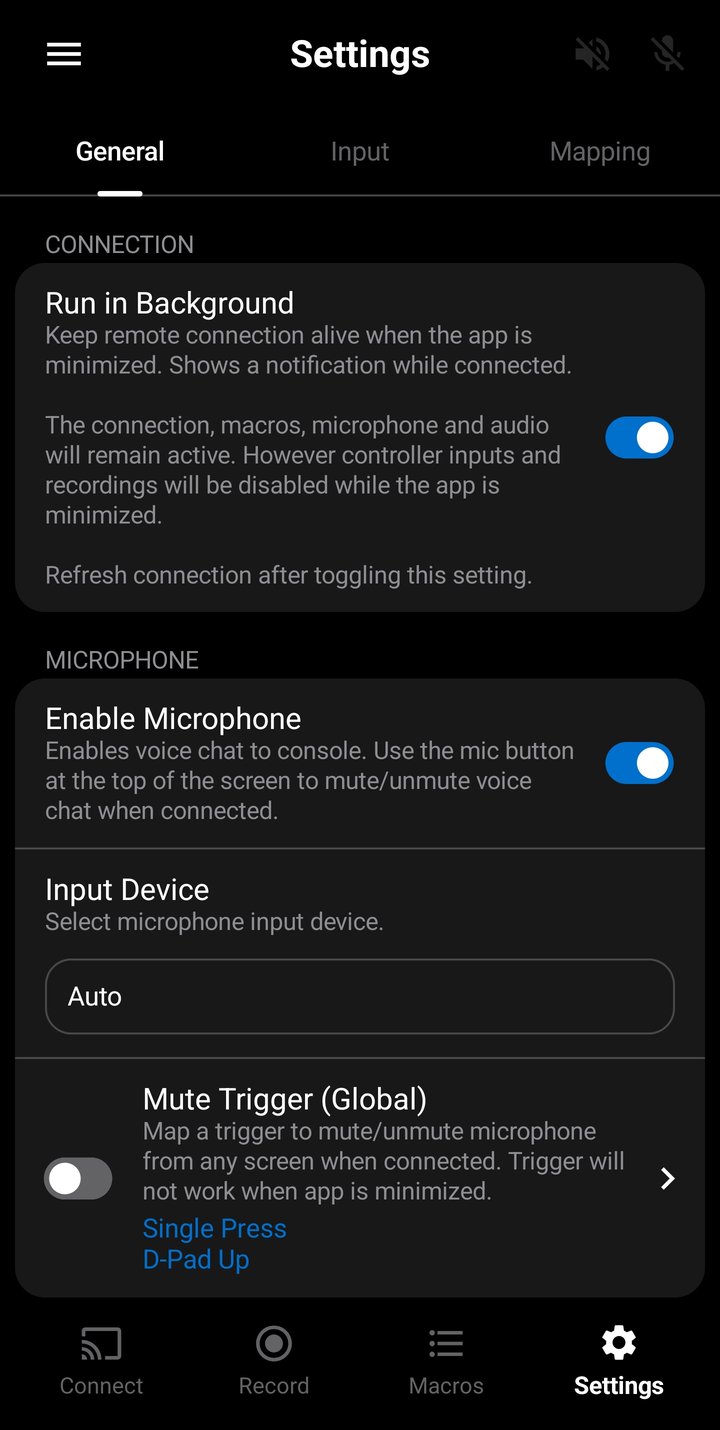
The General tab contains permission and audio settings. All settings are applied in real-time and persist across app restarts. A Reset to Defaults button at the bottom restores factory values for this tab.
Run in Background
When enabled, the Remote Play connection stays alive when you switch to another app or turn off the screen. A persistent notification is shown while connected. This is useful for keeping macro playback and audio running while using other apps.
While running in background:
- The connection, active macros, microphone, and game audio remain active.
- Controller inputs and recordings are disabled — the phone cannot receive controller events while the app is not in the foreground.
Run in Background must be enabled before connecting to the console. Toggling it mid-connection has no effect — disconnect and reconnect after changing this setting.
Microphone
When enabled, the microphone captures audio from your phone and sends it to the console as voice chat during Remote Play.
The first time you enable the microphone, Android will prompt for microphone permission. If permission is denied, you can grant it later from your phone's app settings.
When the microphone is enabled, two additional settings appear:
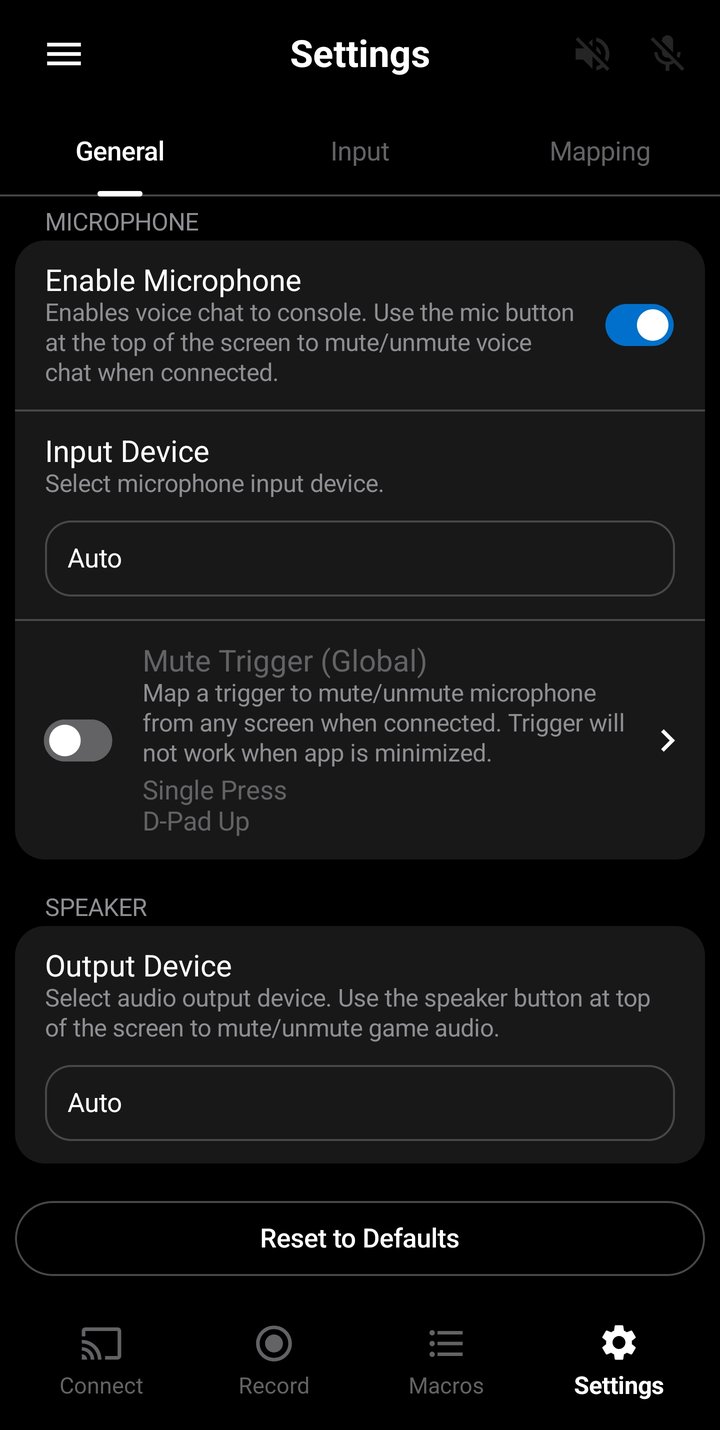
- Input Device — Select which microphone to use. The dropdown lists all available audio input devices, "Auto" defaults to internal phone mic.
- Mute Trigger — Assign a controller trigger to toggle the microphone mute on and off from any screen while connected. This is a global trigger — it works regardless of which screen you are on, unlike record/macro triggers which are screen-specific. The trigger does not work when the app is minimized. See Trigger Actions for configuration options.
If passthrough is disabled on the mute trigger, the controller input will be blocked from reaching the console on all screens — not just the Settings screen. Make sure you don't need that button for gameplay, or enable passthrough to let the input pass through while still toggling mute.
A microphone icon appears in the top toolbar on all screens while connected to the console. Tap it to quickly mute or unmute the microphone without navigating to Settings. The icon changes to reflect the current mute state.
Audio Output
Game audio from the console is played through your phone's speaker or connected audio device. The speaker is always enabled — use the toolbar icon to silence it.
Output Device — Select which audio output device to use. The dropdown lists all available audio input devices, "Auto" defaults to phone speaker.
When a DualSense controller is connected via USB, Android's "Auto" output device setting may route audio to the controller's built-in USB audio interface instead of the phone speaker. If you hear no sound, manually select Internal Speaker from the output device dropdown.
Input
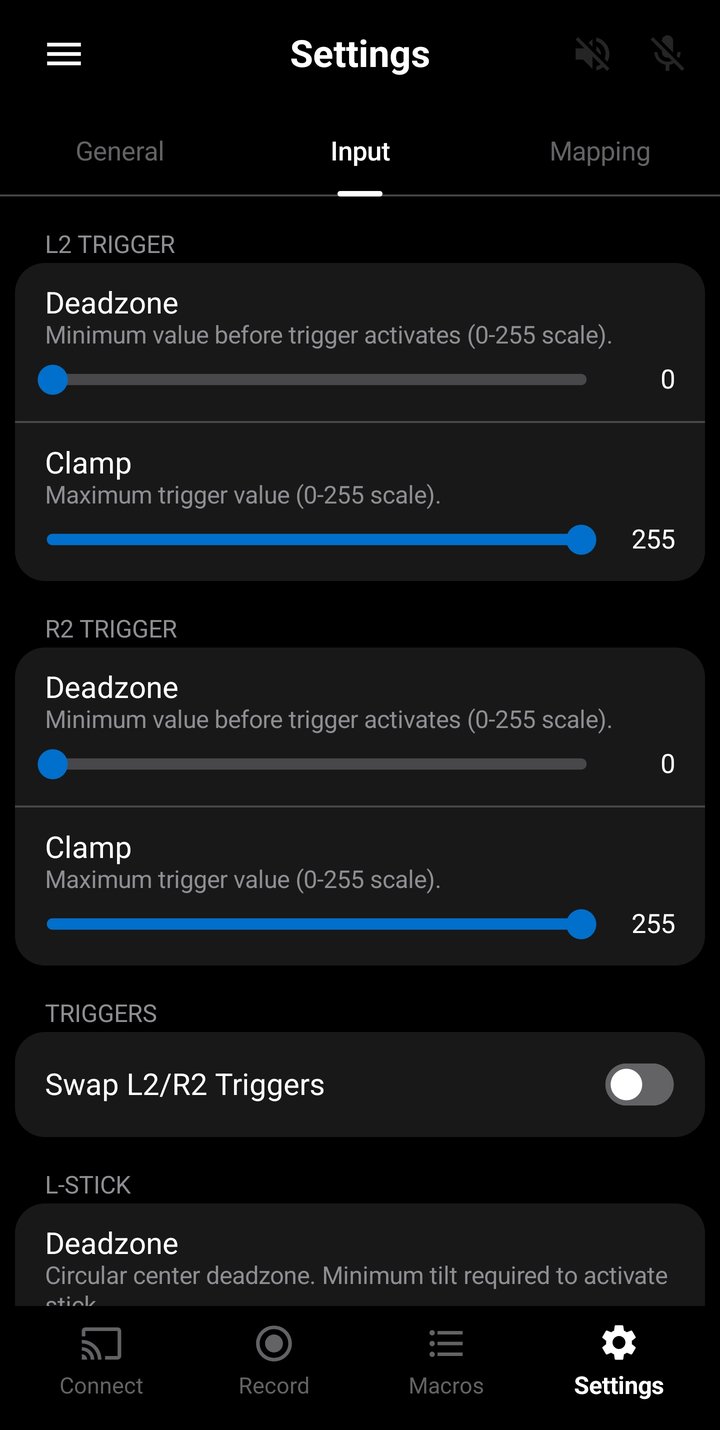
The Input tab controls how analog sticks and L2/R2 triggers are processed before being sent to the console. Input settings are applied before button mappings and trigger detection — recordings, triggers and console see the processed values. A Reset to Defaults button at the bottom restores factory values for this tab.
Deadzone
Triggers (L2/R2) — Sets the minimum raw value before the trigger activates. Values below the deadzone are sent as 0 to the console. Useful for triggers that register a small value at rest.
- Range: 0–110 (on a 0–255 raw scale)
- Default: 0 (no deadzone)
- Configured independently for L2 and R2
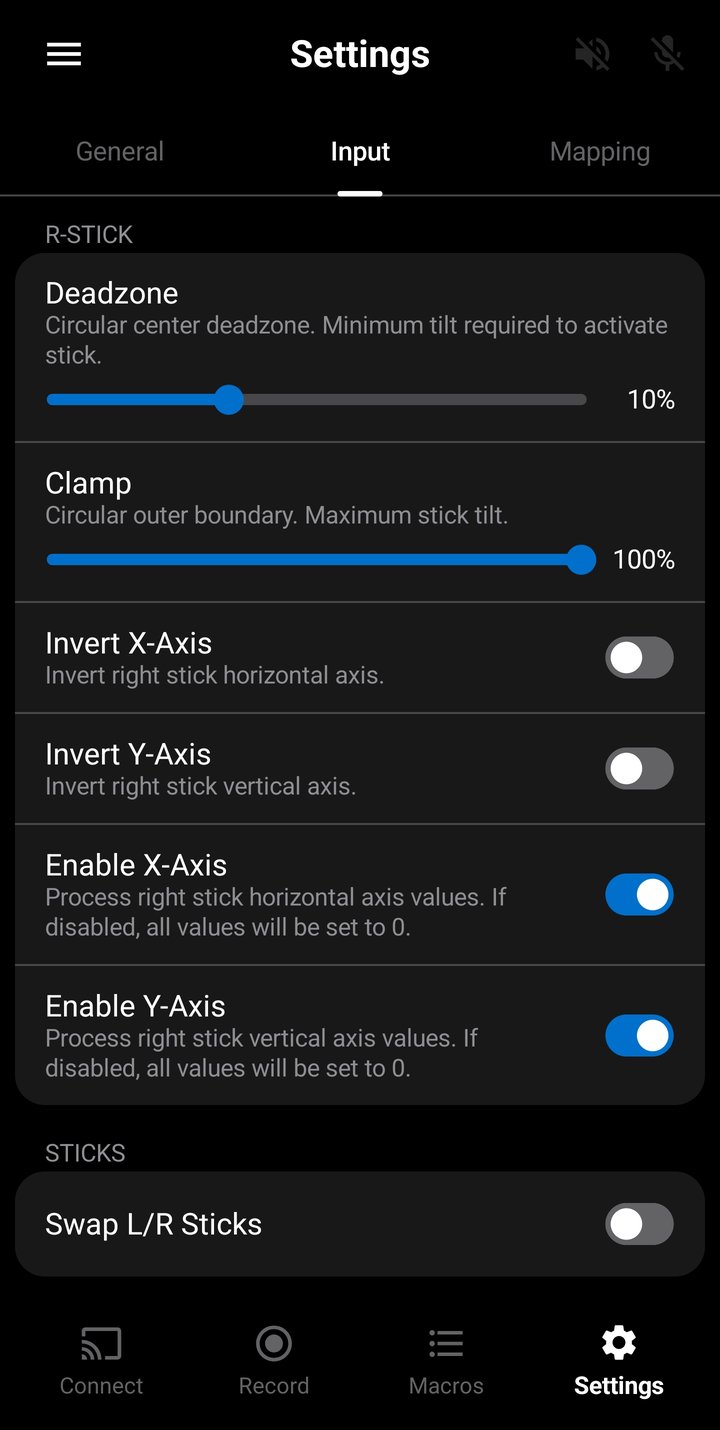
Sticks — Sets a circular center deadzone. Any stick movement with a magnitude below this threshold is ignored and sent as (0, 0) to the console. This prevents stick drift — small unintended movements when the stick is at rest. The deadzone is magnitude-based (circular), not per-axis, so diagonal movements are treated the same as cardinal directions.
- Range: 0–30% of full tilt
- Default: 10%
- Configured independently for left and right sticks
To find the right value, open the Controller Test screen, release both sticks, and check the Tilt values. If a stick shows a small tilt percentage at rest, set the deadzone slightly above that value.
Clamp
Triggers (L2/R2) — Caps the maximum raw trigger output. Any press beyond this value is cut off. For example, if clamp is set to 200, the trigger output ranges from 0–200 and can never reach 255. The range is not rescaled.
- Range: 120–255 (on a 0–255 raw scale)
- Default: 255 (full range)
- Configured independently for L2 and R2
Since values above the clamp are cut off before trigger detection, any trigger configured to fire above the clamp range will never activate.
Sticks — Sets a circular outer boundary that caps the maximum stick output. Any stick movement beyond this percentage is cut off — the output will never exceed the clamp value. For example, if clamp is set to 80%, the stick output ranges from 0–80% and can never reach 100%. The range is not rescaled.
- Range: 40–100% of full tilt
- Default: 100% (full range)
- Configured independently for left and right sticks
Invert
Inverts a stick axis so that the output direction is reversed. Each stick has independent toggles for the X-axis (horizontal) and Y-axis (vertical).
- Invert X-Axis — Left becomes right and vice versa.
- Invert Y-Axis — Up becomes down and vice versa. Common for flight controls or inverted aim preference.
Swap
Swap L/R Sticks swaps the output of the left and right sticks. When enabled, left stick input is sent as right stick data and vice versa. Useful for southpaw or legacy stick layouts where movement and camera controls are on opposite sticks from the default.
Swap L2/R2 Triggers swaps the output of the left and right analog triggers. When enabled, L2 input is sent as R2 and vice versa.
Enable Axes
Each stick has independent Enable X-Axis and Enable Y-Axis toggles. When an axis is disabled, its value is always sent as 0 regardless of stick position. This lets you lock a stick to horizontal-only or vertical-only movement.
Disabled axes are zeroed out before trigger detection and recording — stick triggers that rely on a disabled axis will not fire, and recordings will not capture movement on that axis.
Mappings
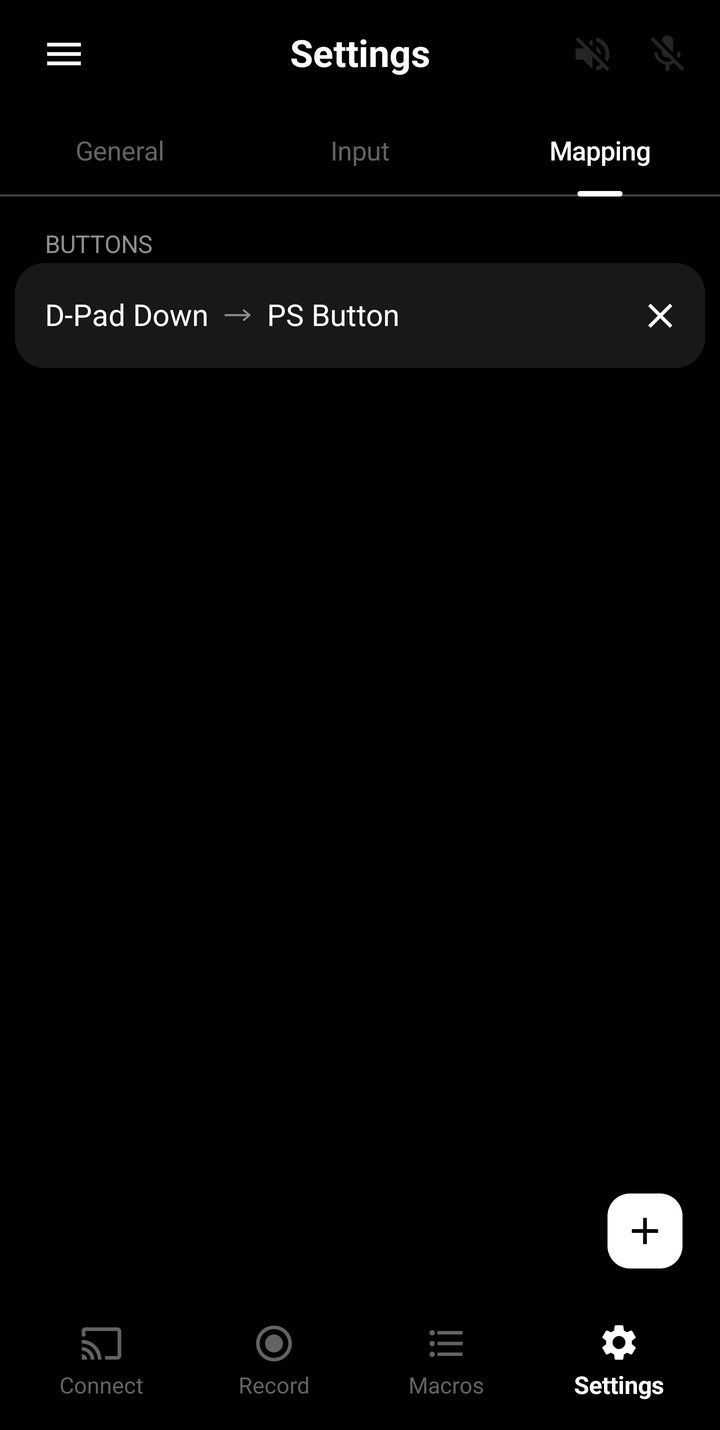
The Mappings tab lets you remap controller buttons so that pressing one physical button sends a different button to the console. For example, you can map Cross to Circle if a game uses a different button layout.
Tap the + button to add a new mapping. Select an Input Button (what you press) and an Output Button (what gets sent). Tap an existing mapping to edit it, or press X to delete.
All 16 controller buttons can be mapped:
- Cross, Circle, Square, Triangle
- L1, R1, L3, R3
- D-Pad Up, Down, Left, Right
- Options, Share, PS, Touchpad Button
Up to 10 button mappings can be active at once. Mappings are applied before the input is sent to the console and before trigger detection and recording, so they will all see the remapped buttons. Mappings affect buttons only — triggers, sticks, and touchpad movement are not remappable.
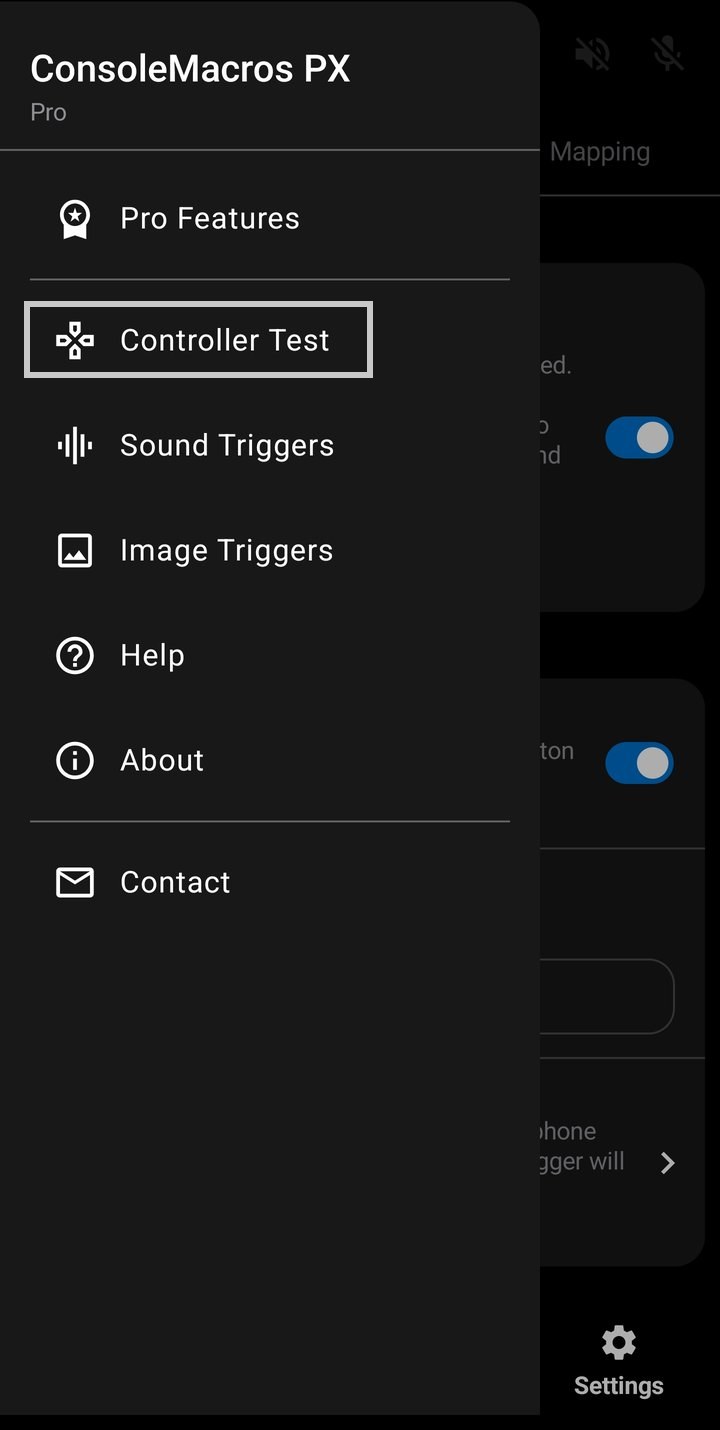
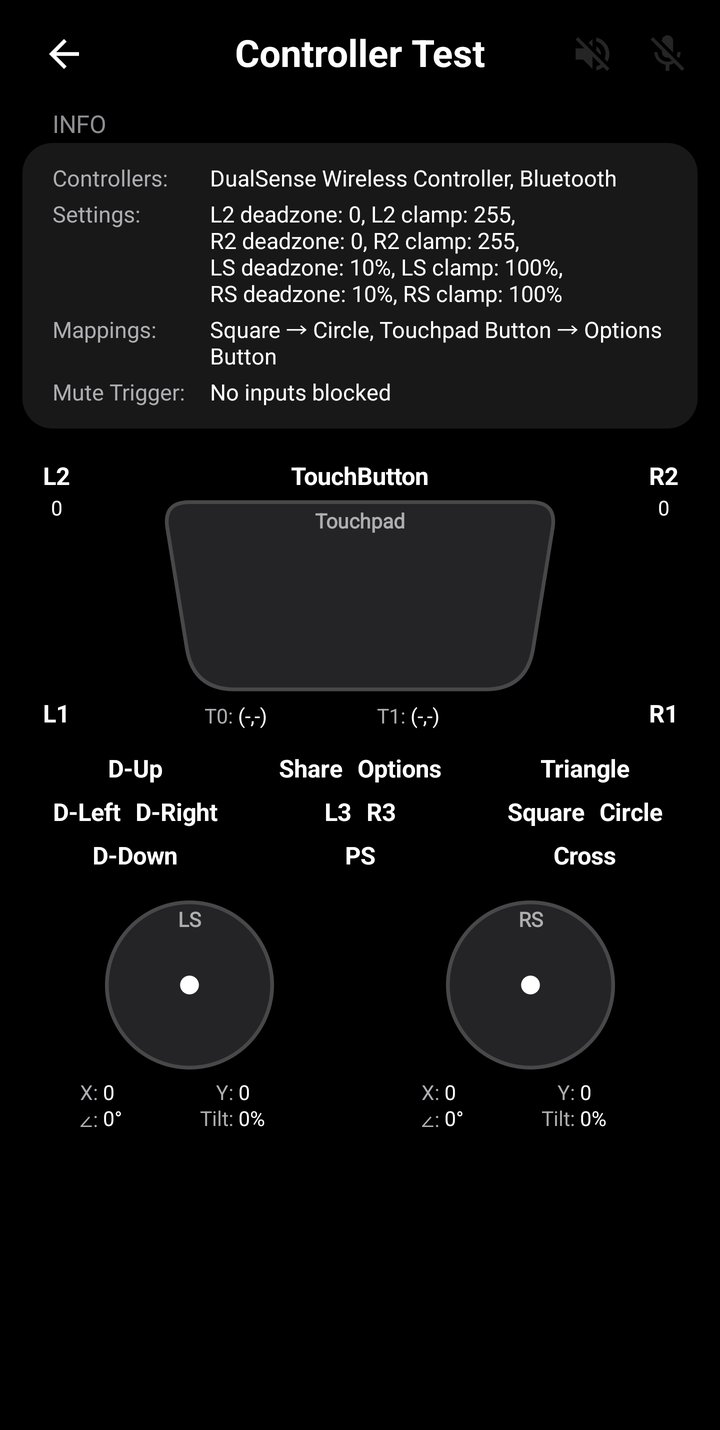
Controller Test
A diagnostic screen accessible from the Settings navigation drawer. It displays the real-time state of all controller inputs — buttons, analog triggers, sticks, and touchpad — showing processed values after all settings (deadzone, clamp, invert, swap) and button mappings have been applied.
The screen shows:
- Controller info — Controller name, connection type (USB or Bluetooth), active input settings, active button mappings, and mute trigger status (which inputs are being blocked).
- Touchpad — Press indicator and a visual canvas tracking up to two simultaneous touch points with X/Y coordinates.
- Triggers — L2 and R2 with analog values (0–255). Labels turn green when the trigger is pressed.
- Bumpers — L1 and R1 press indicators.
- Buttons — D-pad, face buttons, and center buttons (Share, Options, L3, R3, PS) with press indicators.
- Sticks — Visual position circles with X, Y, Angle, and Tilt values for each stick.
Use this screen to verify that your controller is detected, all inputs are mapped correctly, and your settings are behaving as expected. If a button press highlights the wrong label, check your button mappings or see the Controller Compatibility section.
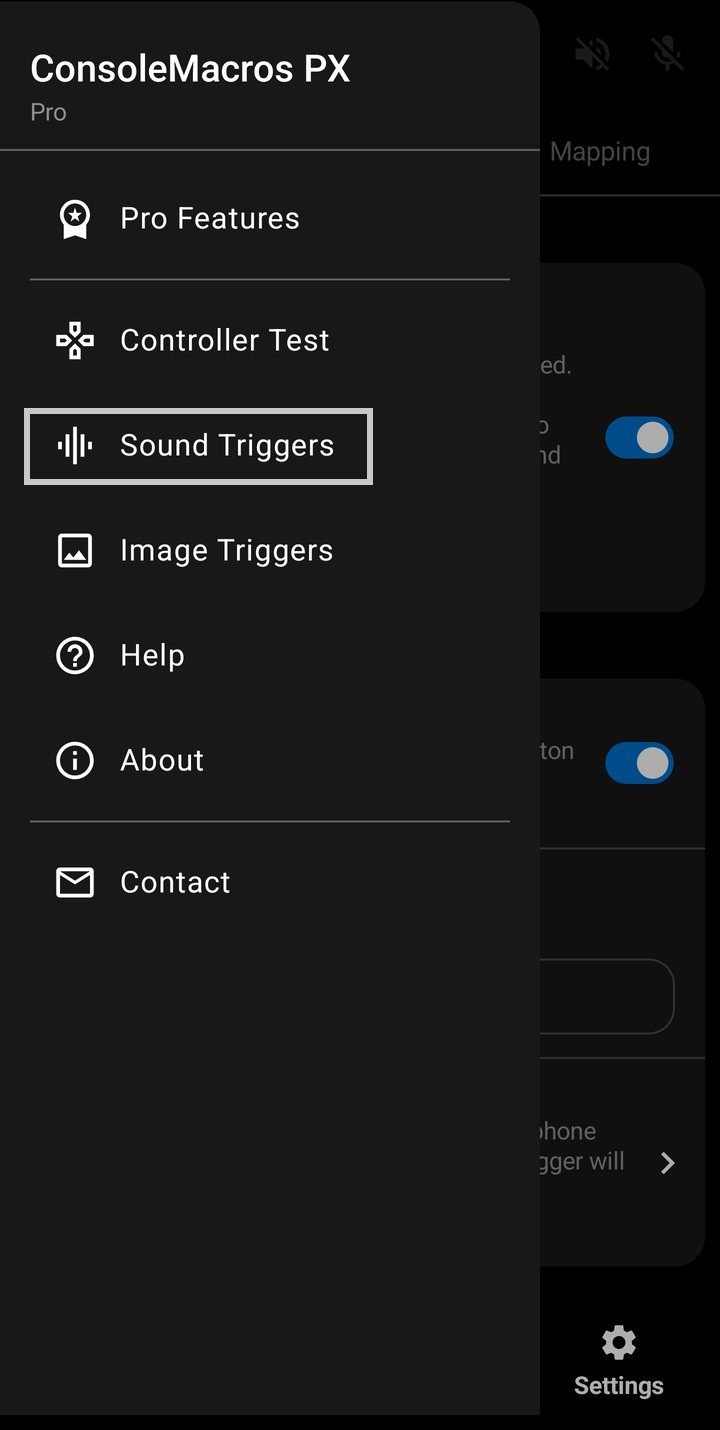
Sound Trigger Test
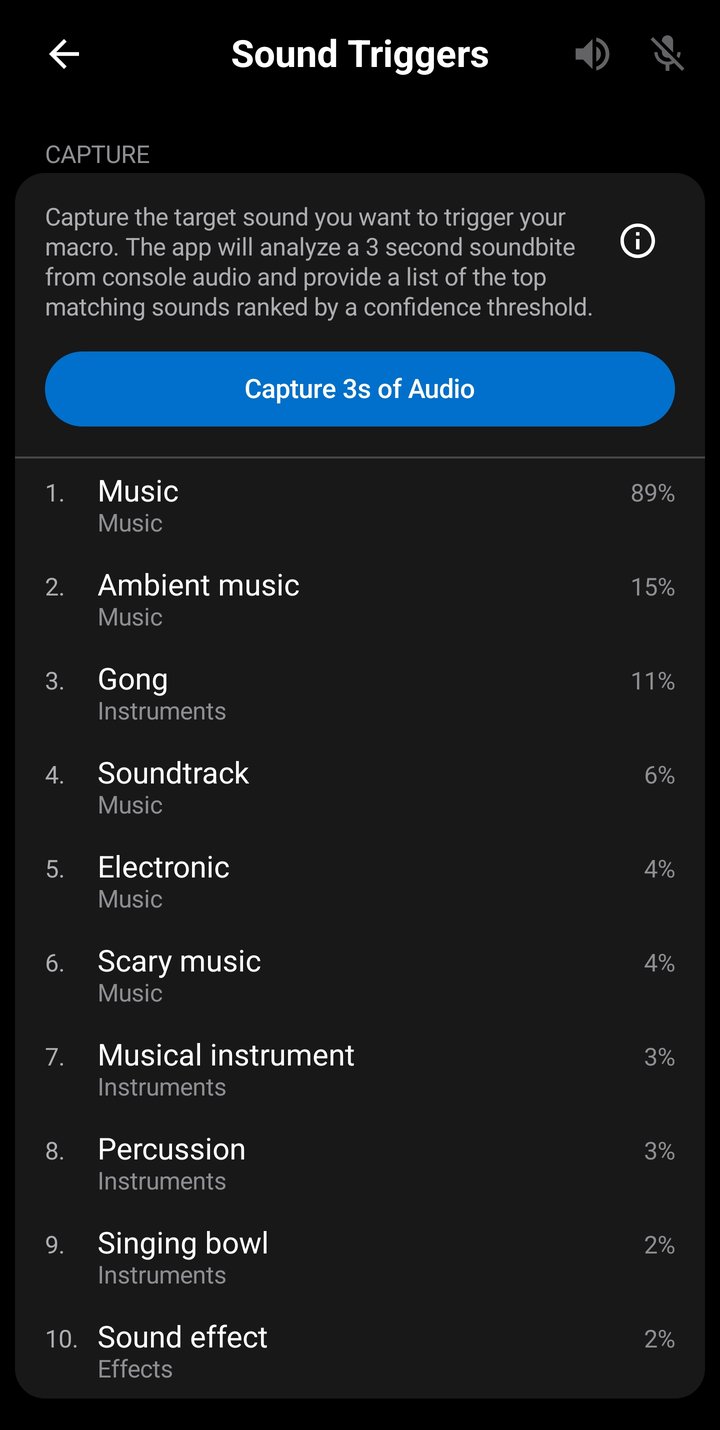
A discovery and testing screen for sound triggers, accessible from the Settings screen navigation drawer. Use it to identify which predefined sound best matches your game's audio and to verify a sound + threshold reliably fires against the live audio stream before binding it to a macro. See Sound Triggers on the Features page for the full feature description.
The screen has two containers, both requiring an active Remote Play connection:
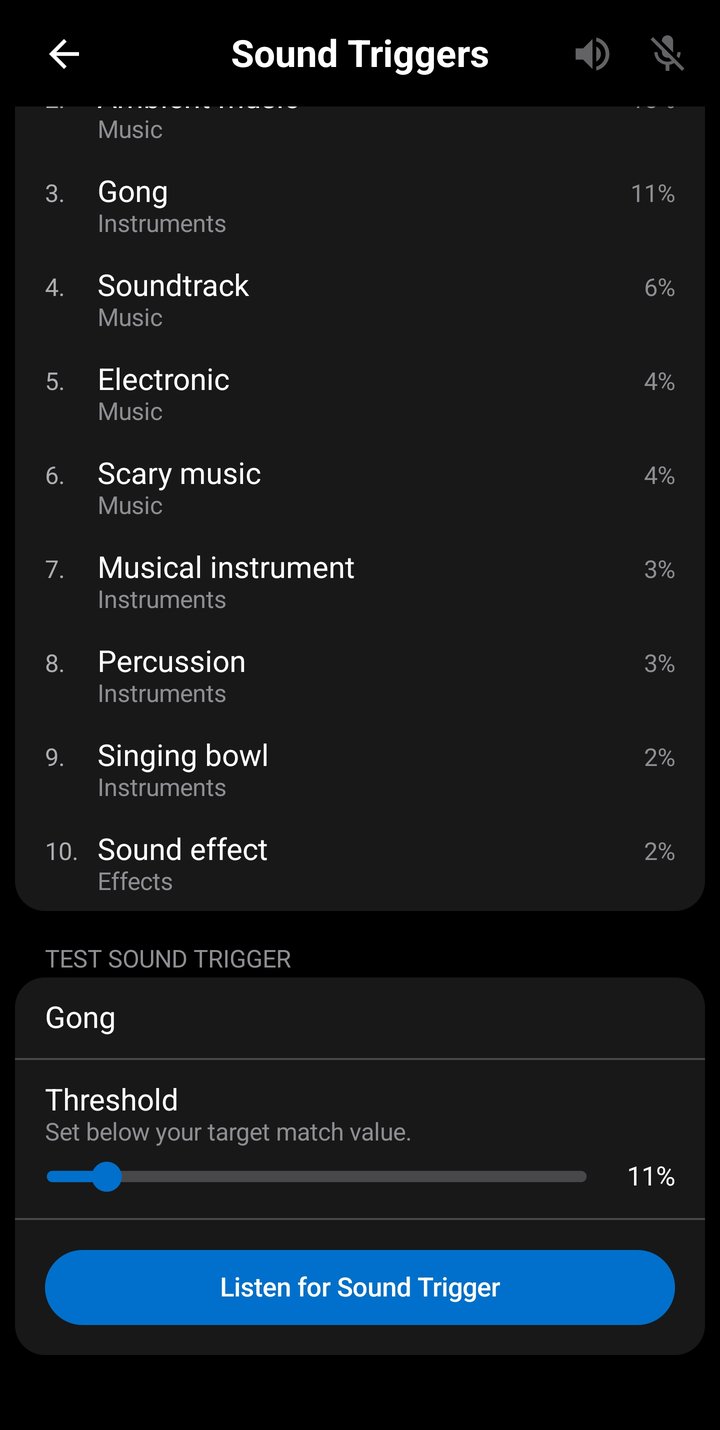
- Capture — Tap Capture 3s of Audio while the target sound is playing. The app analyzes the 3-second sample and lists the top matching sounds ranked by confidence percent. Tap a result row to load it into the Test Sound Trigger container with a threshold pre-set just below the captured score.
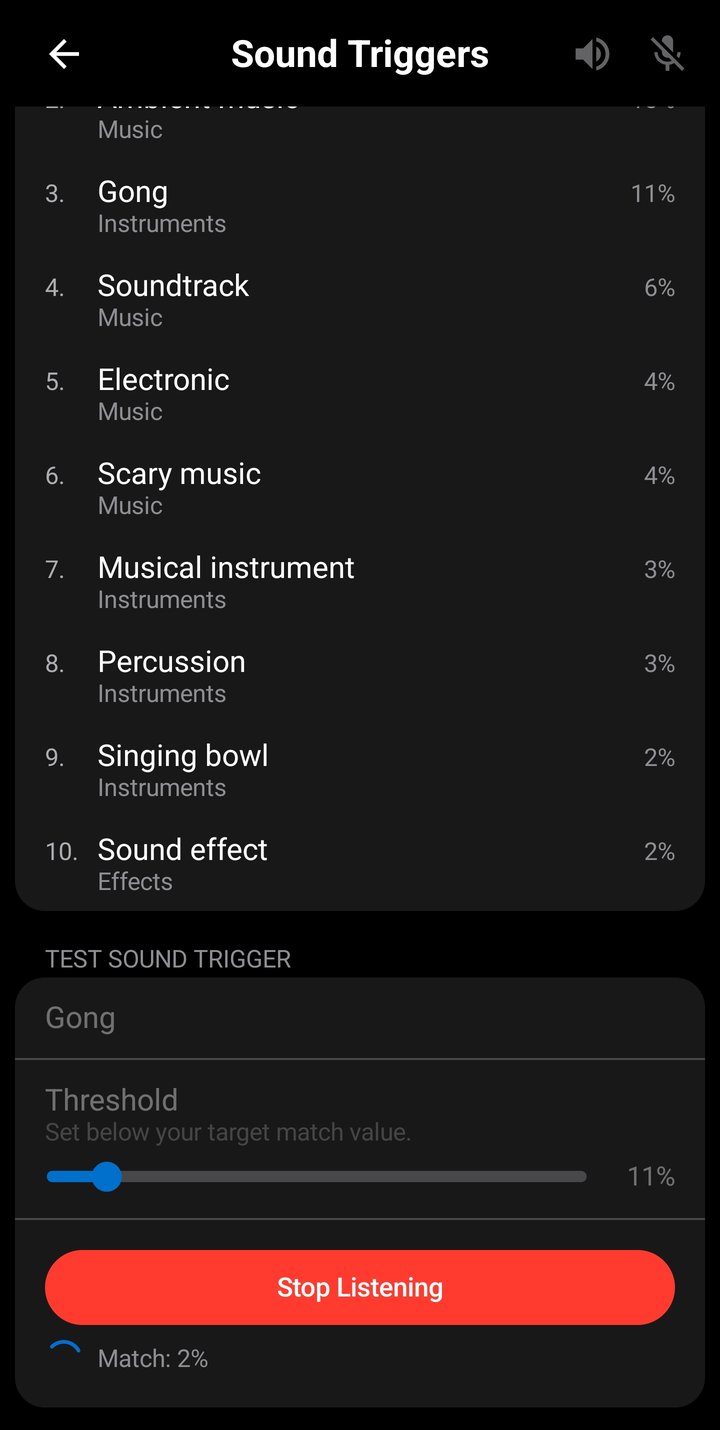
- Test Sound Trigger — Pick a sound from the 500+ predefined library, set a confidence threshold (1–99%, default 20%), and tap Listen for Trigger. The container fires Triggered at N%! on a match so you can confirm reliability before binding the sound to a real macro.
All audio analysis runs on-device — no audio is recorded, stored, uploaded, or shared. The screen is fully available to free tier users so you can verify sound detection works for your specific game before upgrading to Pro to bind sound triggers to macros.
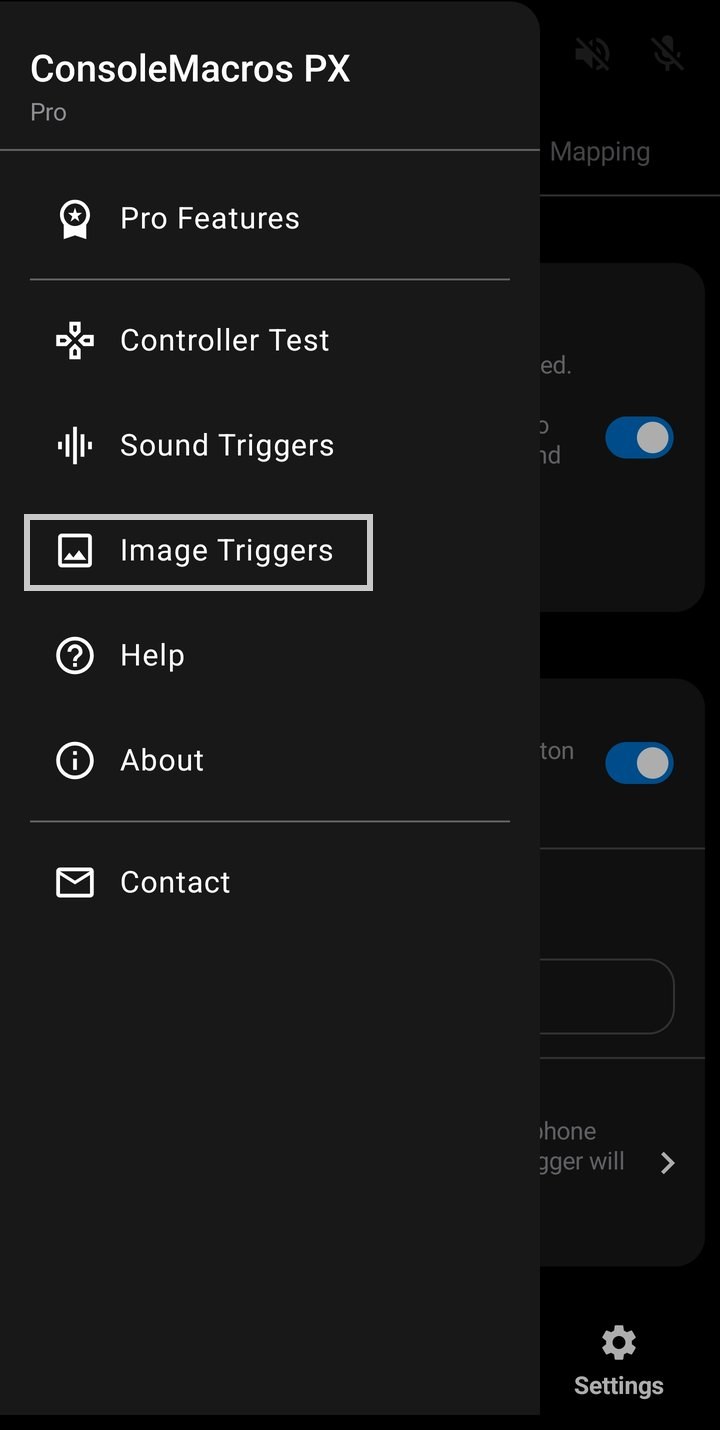
Image Trigger Test
A capture and testing screen for image triggers, accessible from the Settings screen navigation drawer. Use it to capture an on-screen element from your console's video and to verify an image + threshold reliably matches against the live video stream before binding it to a macro. See Image Triggers on the Features page for the full feature description.
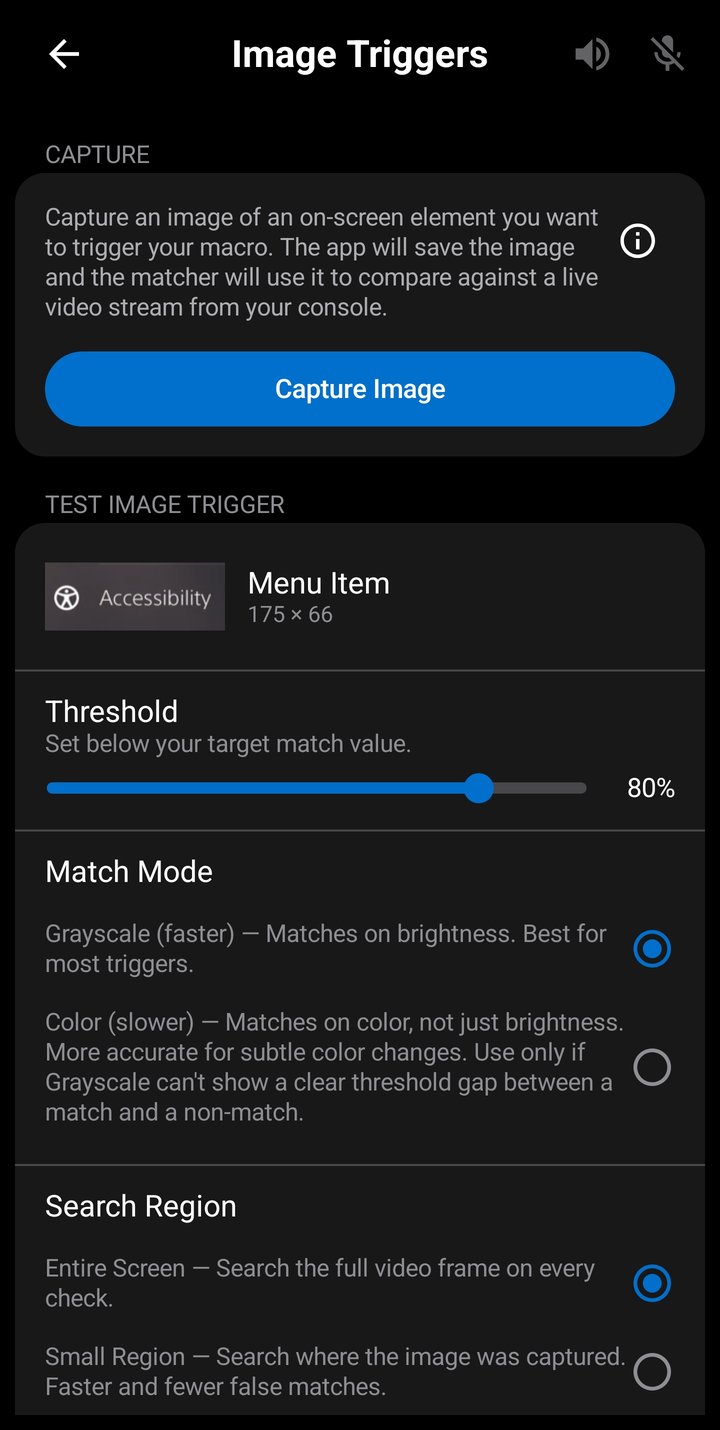
The screen has two containers, both requiring an active Remote Play connection:
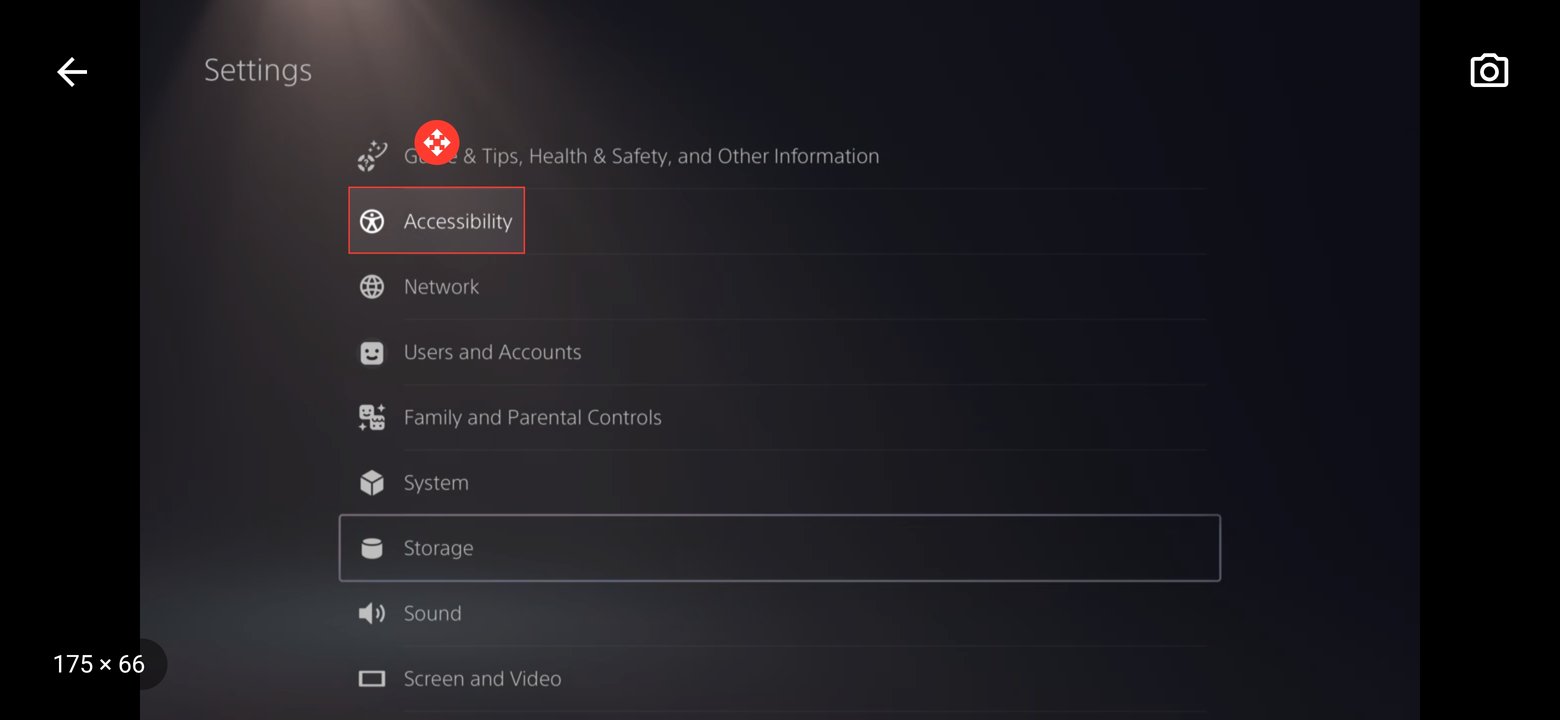
- Capture — Tap Capture Image to open the capture screen, frame the on-screen element with the resizable red rectangle (pinch to zoom in for small elements), then click the camera icon in the top right of the screen to save the cropped image to your library with a name. Saved images can be renamed, exported, imported, and deleted.
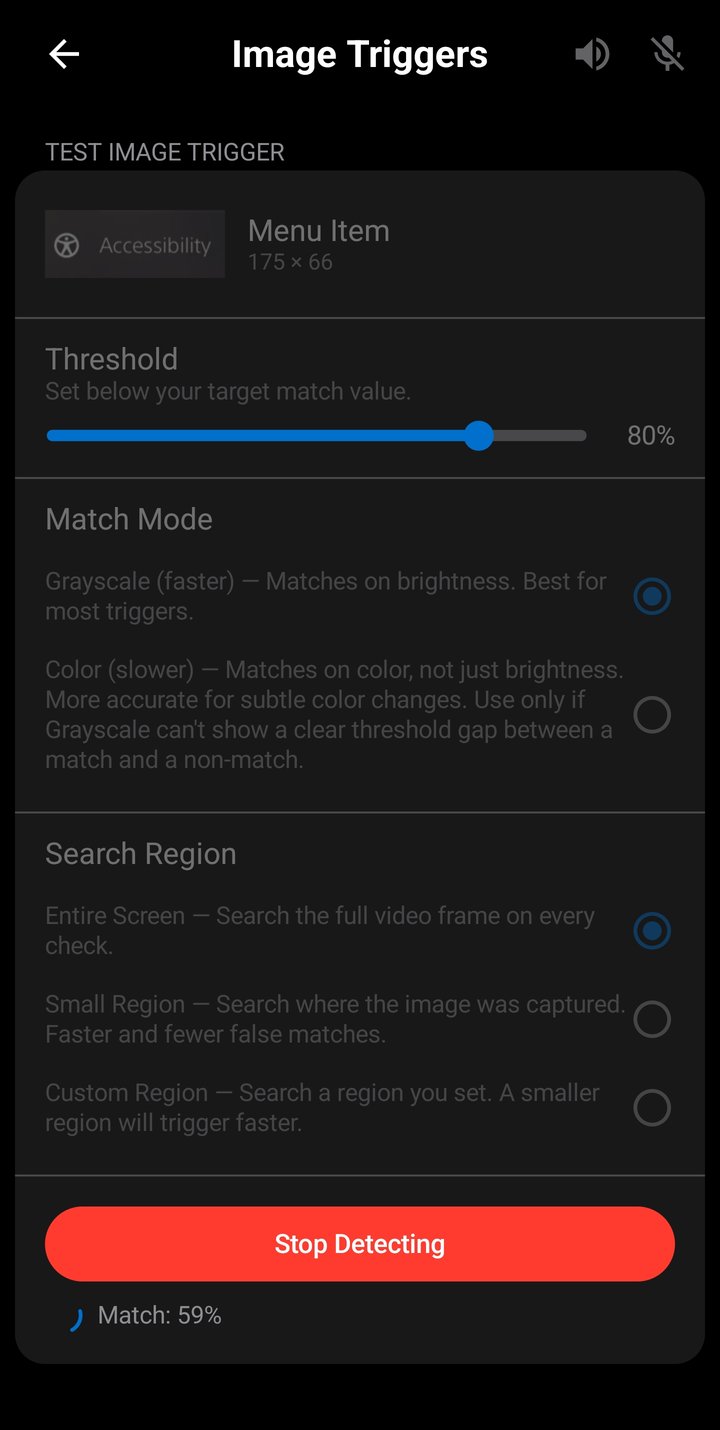
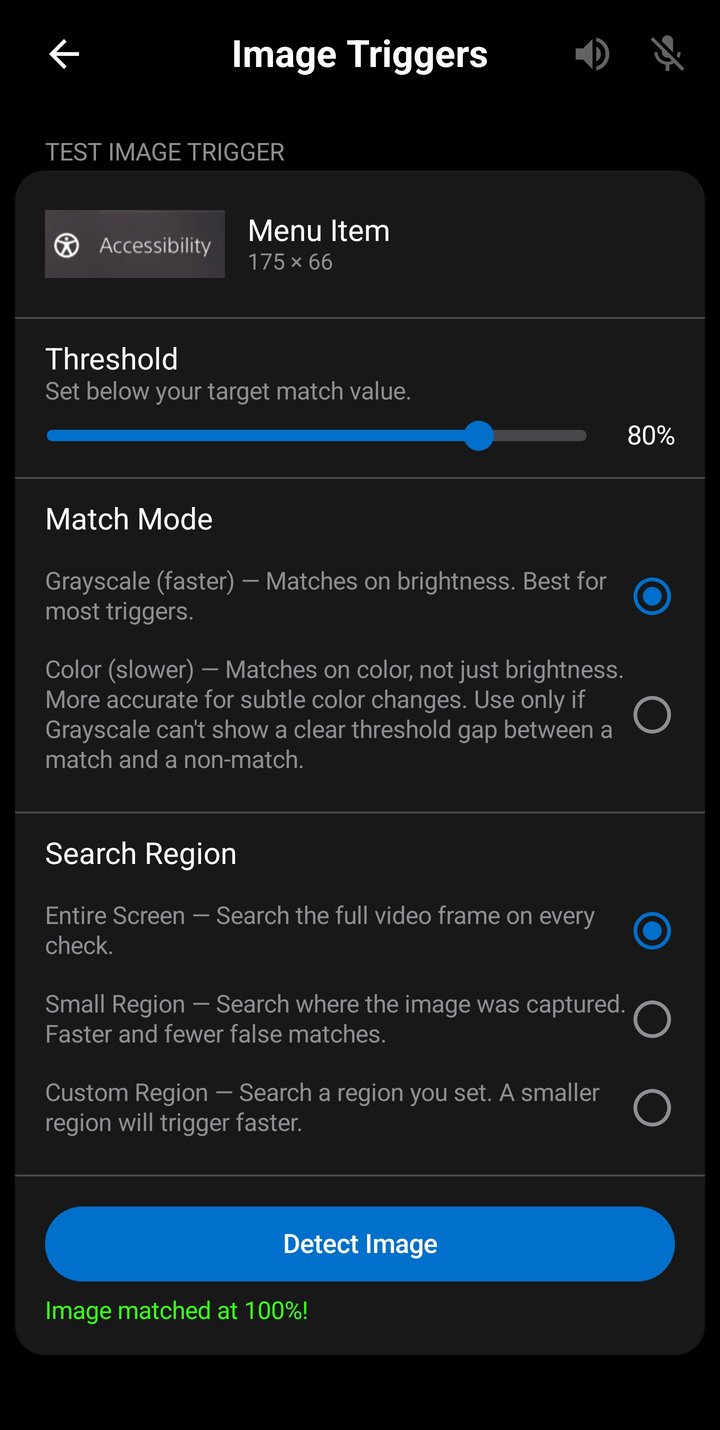
- Test Image Trigger — Pick a saved image, set a confidence threshold (1–99%, default 20%), choose a Match Mode (Grayscale or Color) and a Search Region (Entire Screen, Small Region, or Custom Region), and tap Detect Image. The container shows the live match percent and fires Image matched at N%! on a match so you can confirm reliability before binding the image to a real macro.
All image matching runs on-device — console video is processed in real time, and no video is recorded, stored, uploaded, or shared; only the small image templates you capture are saved locally. The screen is fully available to free tier users so you can verify image detection works for your specific game before upgrading to Pro to bind image triggers to macros.
Controller Compatibility
ConsoleMacros PX works with any USB or Bluetooth HID controller that Android recognizes. The following controllers have been tested.
DualSense (PS5)
Supported over both USB and Bluetooth. All buttons, analog triggers, sticks, and D-pad work on all phones.
- Touchpad press — Works on all phones.
- Touchpad touch and movement — Requires a phone with a newer Linux kernel (5.12+, typically Android 12 or later) that includes the DualSense-specific HID driver. On older phones, the generic HID driver does not expose touchpad touch events. Touchpad press still works.
- Not supported — Haptic feedback, adaptive triggers, and gyroscope/accelerometer are not supported.
Xbox Controllers
Xbox Wireless Controllers (Xbox One and Xbox Series X|S) are supported over Bluetooth and USB. All buttons, analog triggers, sticks, and D-pad work.
- Xbox button — Intercepted by Android at the system level (minimizes the app). This cannot be captured by any app.
- USB on older phones — Xbox USB may not work on phones with older Linux kernels (typically Android 11 or earlier). The generic driver recognizes the controller but does not deliver input events. Use Bluetooth instead.
- Not supported — Vibration is not supported.
DualShock 4 v1 (PS4)
Supported over Bluetooth. All buttons, analog triggers (full analog range), sticks, and D-pad work on all phones.
- Touchpad — Same as DualSense: press works on all phones, touch and movement require a newer Linux kernel (5.12+, typically Android 12 or later).
- Older phones over Bluetooth — All inputs work, but the DS4 v1 may become extremely laggy after extended use on phones with older Linux kernels. This is a system-level Bluetooth stack issue — only a phone reboot resolves it.
- DS4 v1 USB — The original DualShock 4 is charge-only over USB and does not transmit input data. Only the DS4 v2 supports USB data. Use Bluetooth for v1 controllers.
- Not supported — Vibration and gyroscope/accelerometer are not supported.
USB vs Bluetooth
Both USB and Bluetooth work well for controller input. USB provides the most consistent timing with lowest jitter, both are more than sufficient for 60fps gameplay, recording and consistent macro playback.
Older Phones
Phones with older Linux kernels (before 5.12, typically Android 11 or earlier) use a generic HID driver for controllers instead of controller-specific drivers. This affects different controllers in different ways:
| Controller | USB | Bluetooth |
|---|---|---|
| DualSense | All inputs work (except touchpad) | All inputs work (except touchpad) |
| Xbox Wireless | Non-functional | All inputs work (except Xbox button) |
| DualShock 4 v1 | N/A (v1 charge-only) | All inputs work (laggy) |
On all older phones, touchpad touch and movement is non-functional for any controller — the generic HID driver does not expose touchpad events. Touchpad press still works on DualSense (remapped automatically). The Controller Test screen is the best way to diagnose what is and isn't working on your phone.
USB OTG Setting
Some phone manufacturers disable USB OTG (On-The-Go) by default and require you to enable it manually before a USB controller will be detected. This is a manufacturer-specific setting, Samsung and Google Pixel phones do not require this. Affected manufacturers may include Sony, Motorola, OnePlus, Xiaomi and Huawei.
If your USB controller is not detected, search your phone's settings for "OTG". The toggle is typically found under System, Additional Settings, Connected Devices, or Battery — the exact location varies by manufacturer and OS version.
Some of these manufacturers automatically disable OTG after approximately 10 minutes of inactivity to save power. If your USB controller stops working mid-session, check that the OTG setting is still enabled.
Other Controllers
ConsoleMacros PX should work with any USB or Bluetooth controller that Android recognizes as a gamepad. The controllers listed above have been fully tested, but many other controllers use the same standard HID protocol and will work without any issues.
If your controller's inputs are not registering correctly — such as buttons being swapped, triggers not responding, or inputs activating the wrong actions — this is often a simple button mapping issue that can be resolved with an app update. Please email support@adaptiveplay.app with your controller model, phone manufacturer/model/android version and a description of the problem, and we will work on adding support for it.
If you have a controller not listed above that is working perfectly, we'd also like to hear from you — email us so we can add it to the list of verified compatible controllers.